


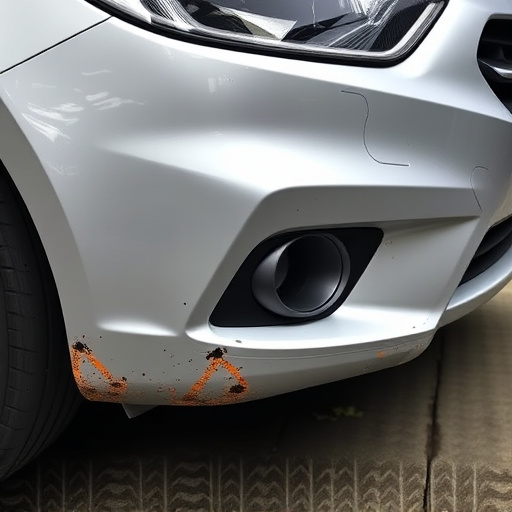

Choosing between DIY and professional Mercedes rear light assembly replacement depends on tools, expertise, and equipment. DIY requires access to specific tools, while professionals use advanced gear, genuine parts, and specialized knowledge for accurate, safe installations. Professionals offer guarantees, minimizing future costs and ensuring a reliable, lasting fix that addresses underlying issues.
Considering replacing your Mercedes rear light assembly? You have two options: professional installation or DIY. This article explores the pros and cons of each approach, guiding you through the process with a step-by-step tutorial. We delve into the necessary tools for both methods, highlighting benefits and drawbacks. Whether you choose to hire experts or tackle it yourself, understanding these aspects ensures a successful Mercedes rear light assembly replacement.
- Professional vs DIY: Tools and Equipment Required
- Step-by-Step Guide for Mercedes Rear Light Assembly
- Benefits of Hiring Pros vs Doing It Yourself
Professional vs DIY: Tools and Equipment Required

When considering whether to tackle a Mercedes rear light assembly replacement as a DIY project or seek professional help, one significant factor is the tools and equipment required. For those opting for a DIY approach, having access to or acquiring essential tools like socket sets, torque wrenches, and specialized automotive screwdrivers is crucial. These tools enable you to disassemble the existing light assembly safely and precisely. Additionally, a clean work area with ample space to maneuver and a clear understanding of the vehicle’s architecture are must-haves.
In contrast, professional automotive repair services or visits to an auto collision center offer a comprehensive solution. Their technicians are equipped with advanced tools and diagnostic equipment tailored for Mercedes benz repair. This ensures not only accurate disassembly but also access to genuine replacement parts, which are vital for maintaining the vehicle’s safety and performance. Moreover, professionals can provide expert advice, ensuring that every step of the replacement process is done correctly, minimizing the risk of further damage to other components.
Step-by-Step Guide for Mercedes Rear Light Assembly

Replacing the Mercedes rear light assembly can be a daunting task for many car owners, but with a step-by-step guide, it’s manageable for both professionals and DIY enthusiasts. Here’s a simplified breakdown to help you navigate this process safely and effectively.
1. Safety First: Park your vehicle on a level surface, engage the parking brake, and ensure it’s in neutral gear. Turn off the engine and allow enough time for all electrical components to dissipate their charge. This is crucial for preventing any accidents or injuries while working on the lights.
2. Gather Tools and Parts: Before beginning, gather all necessary tools like a jack, jack stands, a new Mercedes rear light assembly (ensure it’s compatible with your vehicle model), wire strippers, screwdrivers, and any other specific tools recommended by your vehicle manufacturer or the parts manual. An auto collision center or mercedes benz repair shop can be a valuable resource for obtaining genuine replacement parts.
3. Remove Existing Lights: Start by carefully removing the existing rear lights. This often involves unscrewing bolts or clips securing them in place. Use the appropriate screwdriver to avoid damaging any surrounding components. Take note of how each part is connected and its position for easier reassembly.
4. Prepare New Assembly: Unpackage the new Mercedes rear light assembly and familiarize yourself with its components. Follow instructions provided by the manufacturer or refer to a detailed guide specific to your vehicle model. Ensure all parts are in good condition and properly aligned before installation.
5. Install New Lights: Position the new lights carefully, ensuring they fit snugly into their designated sockets. Secure them using the appropriate bolts or clips, tightening them firmly but not excessively to avoid damage. Double-check that all connections are secure and properly routed.
6. Test Functionality: Once installed, test each light thoroughly to ensure proper functionality. Check for any leaks or electrical issues before driving your vehicle again. Regular visits to an auto repair shop can help maintain the integrity of these essential safety components.
Benefits of Hiring Pros vs Doing It Yourself

When it comes to replacing your Mercedes rear light assembly, whether you choose to do it yourself (DIY) or hire professionals depends on various factors. One significant advantage of enlisting the help of auto body shops or collision damage repair experts is their specialized knowledge and access to high-quality parts. Pros are trained to handle intricate automotive systems, ensuring precise installation and minimizing the risk of further damage, especially when dealing with complex Mercedes models. This is particularly crucial for rear light assemblies, as incorrect assembly can impact the vehicle’s lighting system and safety features.
Professional services also come with guarantees and warranties, offering peace of mind. They can provide expert advice on handling any underlying issues, such as scratch repair or collision damage repair, that may accompany the initial replacement. This level of service ensures a more reliable and lasting fix, saving you potential future costs and headaches.
When it comes to replacing your Mercedes rear light assembly, opting for a professional service offers numerous advantages. While DIY methods may seem appealing, the specialized tools and technical know-how required ensure a precise and safe installation. Pros can complete the job efficiently, guaranteeing a flawless fit and enhancing your vehicle’s overall safety on the road. So, whether it’s convenience, expertise, or peace of mind you’re after, hiring professionals for your Mercedes rear light assembly replacement is a smart choice.