


To clean your Mercedes rear light assembly, set up a dedicated workspace with essential tools and safety gear. Remove the assembly carefully, clean and dry a damaged or cloudy lens using microfiber cloths and glass cleaner, and ensure proper ventilation during the process. For delicate cases, consider professional repair services.
Learn how to expertly clean your Mercedes rear light assembly with this step-by-step guide. Before you begin, ensure your workspace is well-lit and organized, and gather the necessary tools like microfiber cloths, isopropyl alcohol, and a soft brush. Carefully remove the rear light assembly, taking note of any screws or fasteners. Next, use a combination of mild soap, water, and gentle scrubbing to eliminate haze and grime from the lens. Finally, dry thoroughly with a clean cloth to restore clarity to your Mercedes’ lights.
- Prepare Your Workspace and Gather Tools
- Remove the Rear Light Assembly Carefully
- Clean and Dry the Lens with Precision
Prepare Your Workspace and Gather Tools

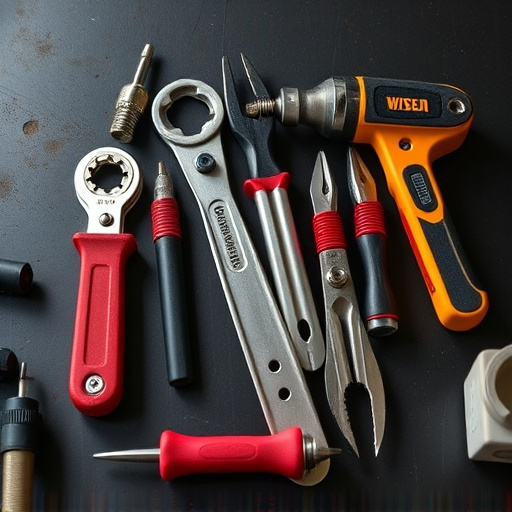
Before you begin the cleaning process, preparing your workspace and gathering the right tools is essential for a successful and efficient job on your Mercedes rear light assembly. Start by clearing a dedicated area, ensuring it’s well-lit and has ample space to accommodate your work. Lay out all the necessary tools within easy reach to streamline the process. This includes items like microfiber cloths, cleaning solutions suitable for automotive use, and possibly a solution specifically designed for polycarbonate or acrylic lenses, depending on the material of your rear lights. Additionally, consider having a container of deionized water handy to rinse off any residual dirt or debris.
For safety and effectiveness, ensure you have safety goggles to protect your eyes from any splashes or debris, especially if you’re working with a car that has recently undergone collision repair or car damage repair. Proper ventilation is also crucial, so open windows or use an exhaust fan to prevent the buildup of fumes from cleaning solutions, especially when performing car paint services on nearby panels. With these preparations in place, you’re ready to tackle the intricate process of lens cleaning with precision and care.
Remove the Rear Light Assembly Carefully

When performing lens cleaning on your Mercedes rear light assembly, the first step is to carefully remove it from your vehicle. This process requires patience and precision. Start by locating the mounting bolts or clips that secure the rear light assembly in place. Using the appropriate tools such as a socket wrench or pliers, gently loosen and detach these components. Remember, a steady hand is crucial to avoid damaging the surrounding parts. Once the assembly is accessible, carefully lift it out of its housing. This step might require some maneuvering to ensure no damage occurs to the light itself or its electrical connections.
For those who aren’t comfortable with auto repair tasks, consider seeking assistance from a reputable collision repair center or fleet repair services. They have the expertise and tools needed to handle such delicate procedures safely, ensuring your Mercedes rear light assembly is ready for lens cleaning without causing any harm.
Clean and Dry the Lens with Precision

After removing the damaged or cloudy lens from your Mercedes rear light assembly, the next step is to thoroughly clean and dry it with precision. Start by using a microfiber cloth to gently wipe away any loose debris or dirt that might have accumulated on the surface of the lens. This gentle approach ensures you don’t scratch the delicate surface. Once the lens is free of visible contaminants, use a high-quality glass cleaner designed specifically for automotive applications. Spray the cleaner onto another clean microfiber cloth and not directly onto the lens to avoid any splashing or overspray. Wipe down the lens in small circular motions, ensuring even coverage without over-saturating it.
As you clean, pay close attention to any hard-to-reach areas or nooks where dirt might be lodged. Remember that proper drying is equally important as cleaning. After wiping down the lens with the glass cleaner, use another dry microfiber cloth to gently absorb any remaining moisture. This step is crucial for preventing water spots or streaks from forming on your Mercedes rear light assembly, ensuring it looks as good as new when you reinstall it at your local car repair shop or take advantage of top-notch car paint services.
Properly cleaning your Mercedes rear light assembly not only restores its clarity but also enhances safety by ensuring optimal visibility. By carefully following these steps, from preparing your workspace to meticulously drying the lens, you can achieve a sparkling result. Remember, a well-maintained rear light assembly is crucial for both your vehicle’s aesthetics and driving safety.